What is OAuth 2.0?
Learn how the Authorization Code Flow allows users to securely sign in with services like Google and GitHub without ever sharing their passwords.

You've seen them everywhere: buttons that say "Sign in with Google" or "Continue with GitHub." This seamless and secure login experience is powered by a protocol called OAuth 2.0. It's the industry standard for allowing one application to interact with another on a user's behalf.
This tutorial will demystify OAuth 2.0 by explaining the problems it solves and breaking down the most common and secure flow; the Authorization Code Flow step-by-step.
5 min read
What You Will Learn:
- The two main problems OAuth solves: easy sign-in and delegated access
- The four key roles in the OAuth flow
- A step-by-step breakdown of the Authorization Code Flow
1. What Problem Does OAuth Solve?
OAuth solves two major problems for modern apps, making life easier and safer for both users and developers.
-
Authentication (Easy Sign-In)
It provides a fast and trusted way for users to sign up and log in. Instead of creating yet another password, they can use an identity they already have (like their Google account). This removes friction and the need for your app to handle things like email verification.
-
Delegated Authorization (Accessing Data)
It allows a user to grant your app limited access to their data on another service without giving you their password. Think of it like a valet key for your car 🔑. You give the valet a key that can only start the car and drive it, but can't open the trunk. OAuth lets a user give your app a "valet key" to access just their contacts, but not their entire account.
2. The Main Actors on Stage
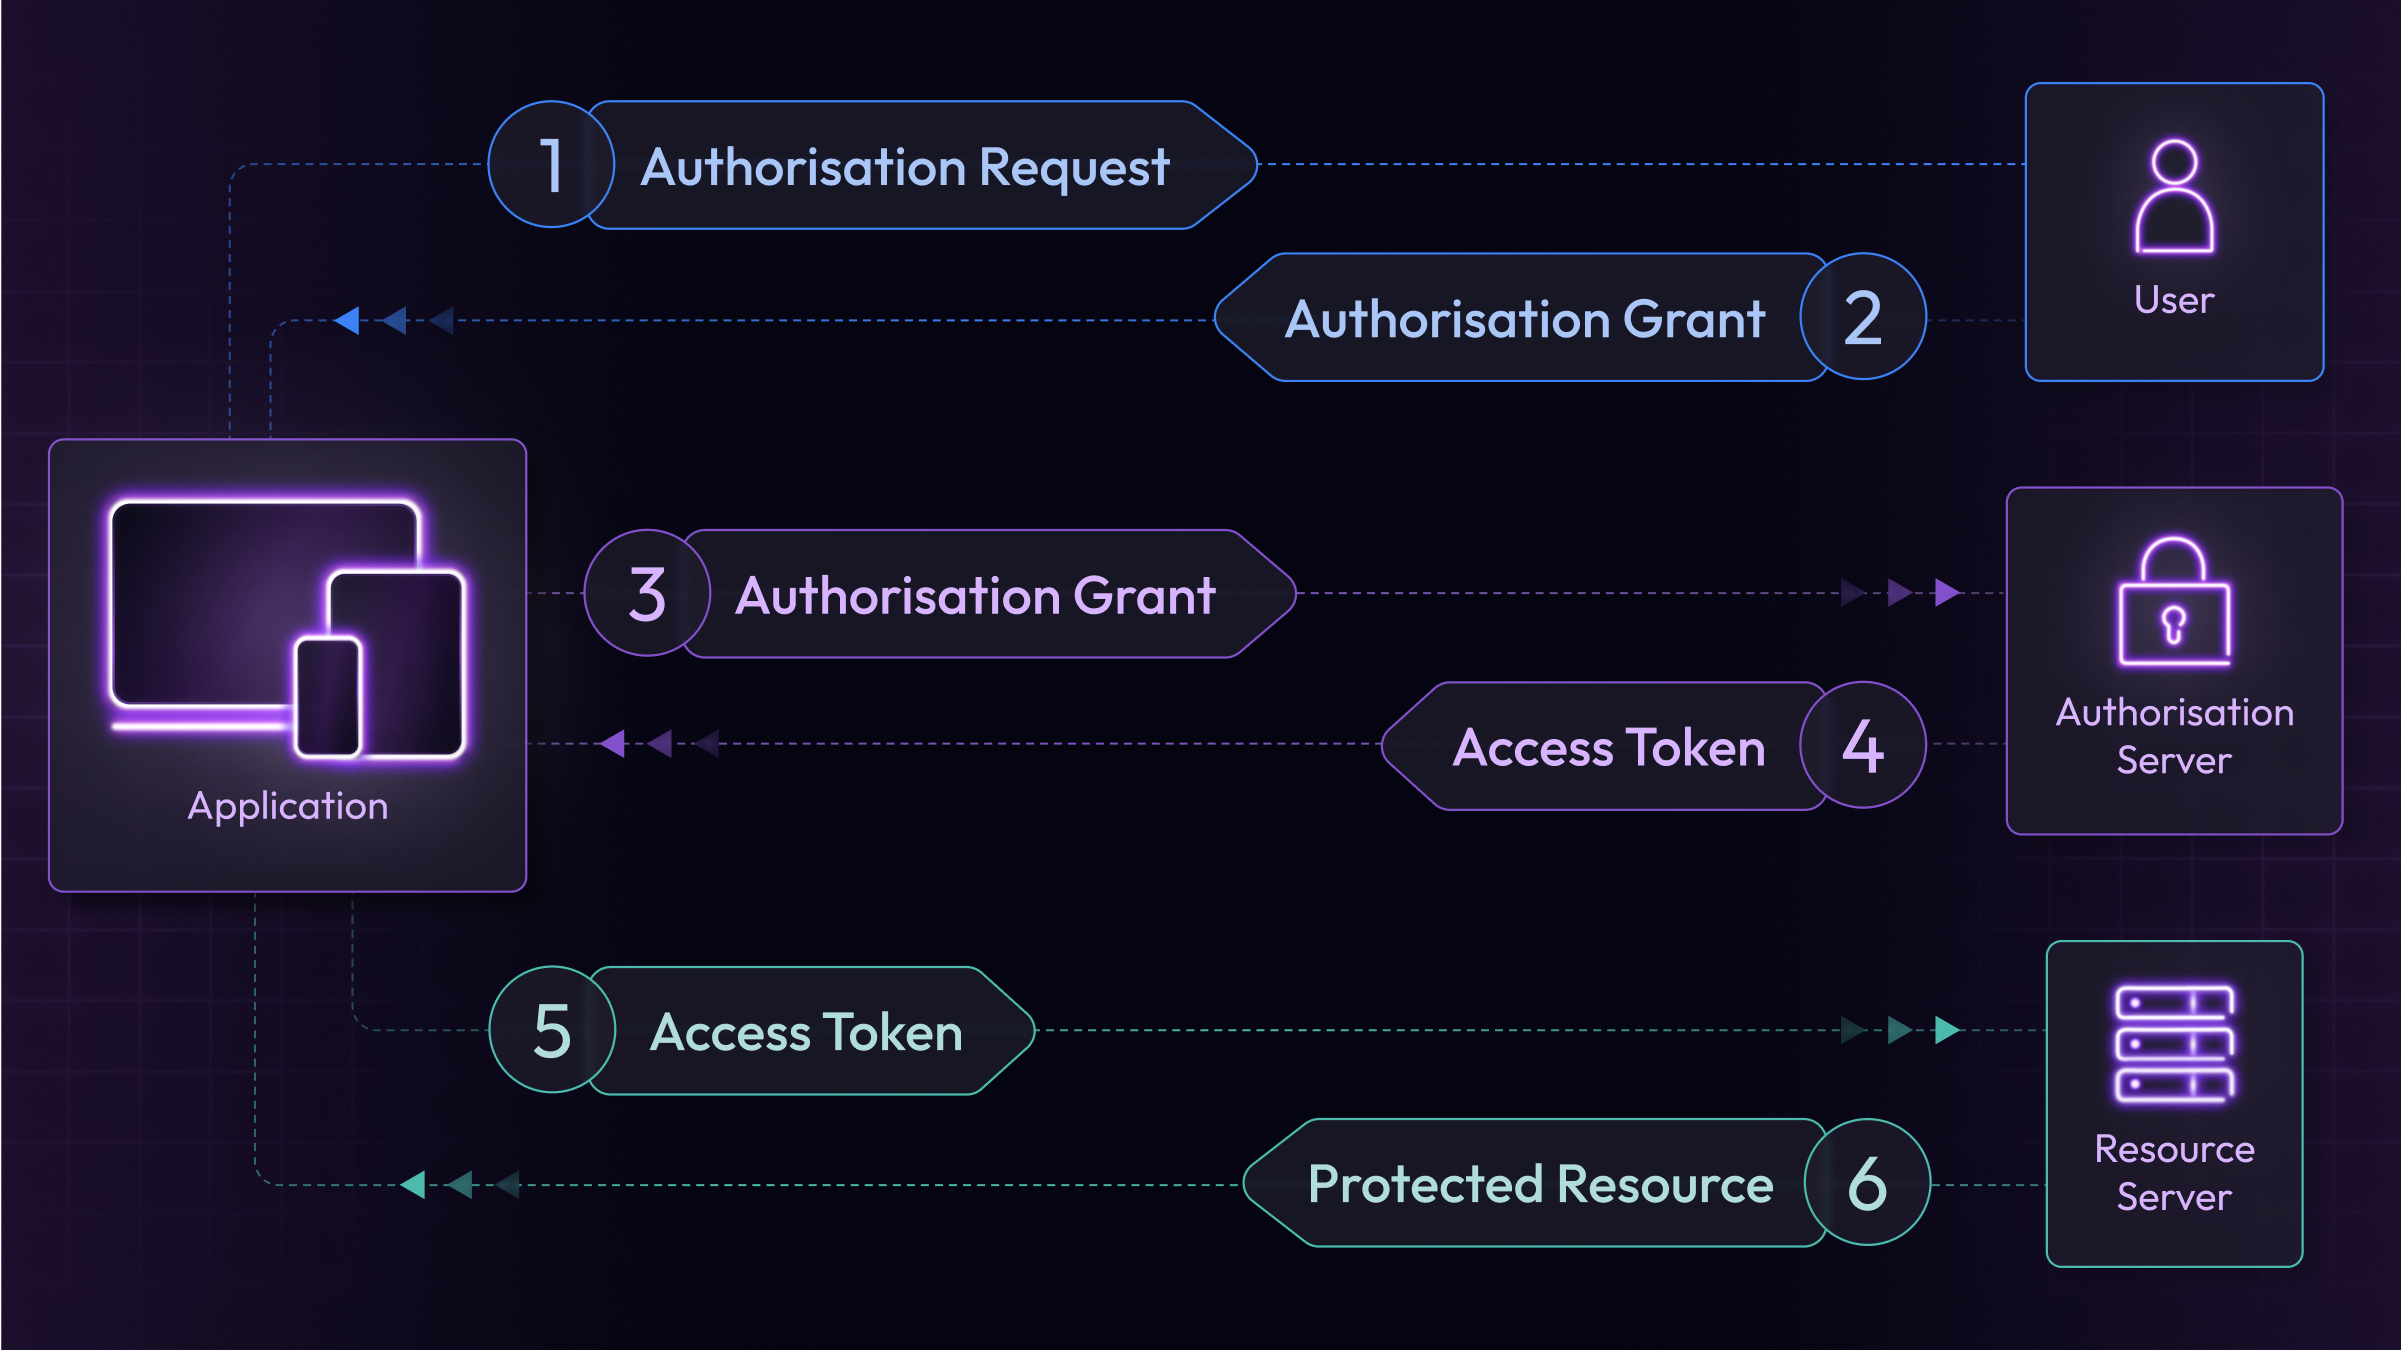
The OAuth flow involves four key participants. Let's imagine "MyCoolApp" wants to see your Google Contacts.
- Resource Owner: The user. You own your Google Contacts.
- Client: Your application (
MyCoolApp). It wants to access the contacts. - Authorization Server: The provider's login service (Google's sign-in and consent screen). It's the bouncer that asks you for permission.
- Resource Server: The provider's API where the data is stored (Google's Contacts API). It's the vault that holds the contacts.
3. The Authorization Code Flow (Step-by-Step)

This is a carefully choreographed sequence of redirects that ensures security.
- The Redirect to the Provider: The user clicks "Sign in with Google." Your app immediately sends them to Google's login page, along with your app's public Client ID.
- The User Consents: The user logs into their Google account and sees a screen that says "MyCoolApp would like to access your contacts." They click "Allow."
- The Redirect Back with a Code: Google redirects the user back to your application with a temporary, one-time-use authorization code in the URL. This code is proof of consent.
- The Secure Backend Exchange: Your backend server receives this code. It then sends a secure, direct request to Google that includes the authorization code and its Client Secret (a password that only your backend and Google know).
- The Access Token is Granted: Google verifies the code and the secret. If everything matches, it sends back an access token. This is the valet key.
- The API Call: Your backend can now use this access token to make requests to Google's Resource Server (the Contacts API) to fetch the user's data.
4. Key Takeaways
- OAuth lets users grant permission without ever sharing their password.
- Your Client Secret is a password for your application; it must never be exposed in a frontend or mobile client and should only live on your backend.
- The Access Token is the temporary key used to make API calls. Your backend gets it by trading a one-time-use authorization code.
What next:
- Ready to build it? Follow our guide on how to Implement Sign in with GitHub using Dart Frog.
- See the pattern again with our guide on how to Implement Sign in with Google using Dart Frog.
Didn’t find what you were looking for? Talk to us on Discord
